Apache CXF - JAX-WS - Spring Boot SOAP Web Service Client Server Example
Table of Contents
Apache CXF is an open source services framework that helps build and develop services using frontend programming APIs, like JAX-WS.
In this tutorial, we will take a look at how we can integrate CXF with Spring Boot in order to build and run a Hello World SOAP service. Throughout the example, we will be creating a contract first client and endpoint using Apache CXF, Spring Boot, and Maven.
General Project Setup #
Tools used:
- Apache CXF 3.2
- Spring Boot 1.5
- Maven 3.5
The below code is organized in such a way that you can choose to only run the client (consumer) or endpoint (provider) part. In the example, we will setup both parts and then make an end-to-end test in which the client calls the endpoint.
For this example, we will start from an existing WSDL file (contract-first) which is shown below. The content represents a SOAP service in which a person is sent as input and a greeting is received as a response.
<?xml version="1.0"?>
<wsdl:definitions name="HelloWorld"
  targetNamespace="http://codenotfound.com/services/helloworld"
  xmlns:tns="http://codenotfound.com/services/helloworld" xmlns:types="http://codenotfound.com/types/helloworld"
  xmlns:soap="http://schemas.xmlsoap.org/wsdl/soap/" xmlns:wsdl="http://schemas.xmlsoap.org/wsdl/">

  <wsdl:types>
    <xsd:schema targetNamespace="http://codenotfound.com/types/helloworld"
      xmlns:xsd="http://www.w3.org/2001/XMLSchema" elementFormDefault="qualified"
      attributeFormDefault="unqualified" version="1.0">

      <xsd:element name="person">
        <xsd:complexType>
          <xsd:sequence>
            <xsd:element name="firstName" type="xsd:string" />
            <xsd:element name="lastName" type="xsd:string" />
          </xsd:sequence>
        </xsd:complexType>
      </xsd:element>

      <xsd:element name="greeting">
        <xsd:complexType>
          <xsd:sequence>
            <xsd:element name="greeting" type="xsd:string" />
          </xsd:sequence>
        </xsd:complexType>
      </xsd:element>
    </xsd:schema>
  </wsdl:types>

  <wsdl:message name="SayHelloRequest">
    <wsdl:part name="person" element="types:person" />
  </wsdl:message>

  <wsdl:message name="SayHelloResponse">
    <wsdl:part name="greeting" element="types:greeting" />
  </wsdl:message>

  <wsdl:portType name="HelloWorld_PortType">
    <wsdl:operation name="sayHello">
      <wsdl:input message="tns:SayHelloRequest" />
      <wsdl:output message="tns:SayHelloResponse" />
    </wsdl:operation>
  </wsdl:portType>

  <wsdl:binding name="HelloWorld_SoapBinding" type="tns:HelloWorld_PortType">
    <soap:binding style="document"
      transport="http://schemas.xmlsoap.org/soap/http" />
    <wsdl:operation name="sayHello">
      <soap:operation
        soapAction="http://codenotfound.com/services/helloworld/sayHello" />
      <wsdl:input>
        <soap:body use="literal" />
      </wsdl:input>
      <wsdl:output>
        <soap:body use="literal" />
      </wsdl:output>
    </wsdl:operation>
  </wsdl:binding>

  <wsdl:service name="HelloWorld_Service">
    <wsdl:documentation>Hello World service</wsdl:documentation>
    <wsdl:port name="HelloWorld_Port" binding="tns:HelloWorld_SoapBinding">
      <soap:address location="http://localhost:9090/codenotfound/ws/helloworld" />
    </wsdl:port>
  </wsdl:service>

</wsdl:definitions>
Maven is used to build and run the example. The Hello World service endpoint will be hosted on an embedded Apache Tomcat server that ships directly with Spring Boot. To facilitate the management of the different Spring dependencies, Spring Boot Starters are used which are a set of convenient dependency descriptors that you can include in your application.
To avoid having to manage the version compatibility of the different Spring dependencies, we will inherit the defaults from the spring-boot-starter-parent parent POM.
There is actually a Spring Boot starter specifically for CXF that takes care of importing the needed Spring Boot dependencies. In addition it automatically registers CXFServlet with a /services/ URL pattern for serving CXF JAX-WS endpoints and it offers some properties for configuration of the CXFServlet. In order to use the starter, we declare a dependency to cxf-spring-boot-starter-jaxws in our Maven POM file.
For Unit testing our Spring Boot application we also include the spring-boot-starter-test dependency.
To take advantage of Spring Boot’s capability to create a single, runnable “uber-jar”, we also include the spring-boot-maven-plugin Maven plugin. This also allows quickly starting the web service via a Maven command.
<?xml version="1.0" encoding="UTF-8"?>
<project xmlns="http://maven.apache.org/POM/4.0.0" xmlns:xsi="http://www.w3.org/2001/XMLSchema-instance"
  xsi:schemaLocation="http://maven.apache.org/POM/4.0.0 http://maven.apache.org/xsd/maven-4.0.0.xsd">
  <modelVersion>4.0.0</modelVersion>

  <groupId>com.codenotfound</groupId>
  <artifactId>cxf-jaxws-spring-boot</artifactId>
  <version>0.0.1-SNAPSHOT</version>
  <packaging>jar</packaging>

  <name>cxf-jaxws-spring-boot</name>
  <description>Apache CXF - Spring Boot SOAP Web Service Client Server Example</description>
  <url>https://www.codenotfound.com/apache-cxf-spring-boot-soap-web-service-client-server-example.html</url>

  <parent>
    <groupId>org.springframework.boot</groupId>
    <artifactId>spring-boot-starter-parent</artifactId>
    <version>1.5.9.RELEASE</version>
  </parent>

  <properties>
    <project.build.sourceEncoding>UTF-8</project.build.sourceEncoding>
    <java.version>1.8</java.version>

    <cxf.version>3.2.1</cxf.version>
  </properties>

  <dependencies>
    <!-- spring-boot -->
    <dependency>
      <groupId>org.springframework.boot</groupId>
      <artifactId>spring-boot-starter-test</artifactId>
      <scope>test</scope>
    </dependency>
    <!-- cxf -->
    <dependency>
      <groupId>org.apache.cxf</groupId>
      <artifactId>cxf-spring-boot-starter-jaxws</artifactId>
      <version>${cxf.version}</version>
    </dependency>
  </dependencies>

  <build>
    <plugins>
      <!-- spring-boot-maven-plugin -->
      <plugin>
        <groupId>org.springframework.boot</groupId>
        <artifactId>spring-boot-maven-plugin</artifactId>
      </plugin>
      <!-- cxf-codegen-plugin -->
      <plugin>
        <groupId>org.apache.cxf</groupId>
        <artifactId>cxf-codegen-plugin</artifactId>
        <version>${cxf.version}</version>
        <executions>
          <execution>
            <id>generate-sources</id>
            <phase>generate-sources</phase>
            <configuration>
              <sourceRoot>${project.build.directory}/generated/cxf</sourceRoot>
              <wsdlOptions>
                <wsdlOption>
                  <wsdl>${project.basedir}/src/main/resources/wsdl/helloworld.wsdl</wsdl>
                  <wsdlLocation>classpath:wsdl/helloworld.wsdl</wsdlLocation>
                </wsdlOption>
              </wsdlOptions>
            </configuration>
            <goals>
              <goal>wsdl2java</goal>
            </goals>
          </execution>
        </executions>
      </plugin>
    </plugins>
  </build>
</project>
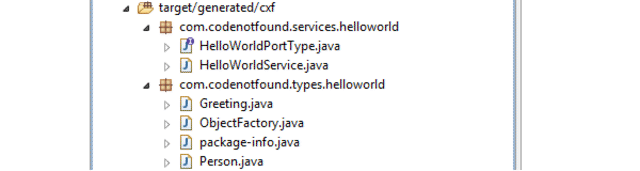
CXF includes a Maven cxf-codegen-plugin plugin which can generate java artifacts from a WSDL file. In the above plugin configuration we’re running the wsdl2java goal in the 'generate-sources' phase. When executing following Maven command, CXF will generate artifacts in the <sourceRoot> directory that we have specified.
mvn generate-sources
After running above command you should be able to find back a number of auto-generated classes among which the HelloWorldPortType interface in addition to Person and Greeting as shown below.
Next, we create a SpringCxfApplication class. It contains a main() method that delegates to Spring Boot’s SpringApplication class by calling run(). SpringApplication will bootstrap our application, starting Spring which will, in turn, start the auto-configured Tomcat web server.
The @SpringBootApplication is a convenience annotation that adds all of the following: @Configuration, @EnableAutoConfiguration and @ComponentScan. Checkout the Spring Boot getting started guide for more details.
package com.codenotfound;

import org.springframework.boot.SpringApplication;
import org.springframework.boot.autoconfigure.SpringBootApplication;

@SpringBootApplication
public class SpringCxfApplication {

  public static void main(String[] args) {
    SpringApplication.run(SpringCxfApplication.class, args);
  }
}
Creating the CXF Endpoint (Provider) #
In order for the CXF framework to be able to process incoming SOAP request over HTTP, we need to setup a CXFServlet. In our previous CXF SOAP Web Service tutorial we did this by using a deployment descriptor file (web.xml file under the WEB-INF directory) or an alternative with Spring is to use a ServletRegistrationBean. In this example, there is nothing to be done as the cxf-spring-boot-starter-jaxws automatically register the CXFServlet for us, great!
We want the CXFServlet to listen for incoming requests on the following URI: /codenotfound/ws, instead of the default value which is: /services/*. This can be achieved by setting the 'cxf.path' property in the application.yml file located under the src/main/resources folder.
client:
  ticketagent:
    address: http://localhost:9090/codenotfound/ws/helloworld

server:
  port: 9090

cxf:
  path: /codenotfound/ws
Next, we create a configuration file that contains the definition of our Endpoint at which our Hello World SOAP service will be exposed. The Endpoint gets created by passing the CXF bus, which is the backbone of the CXF architecture that manages the respective inbound and outbound message and fault interceptor chains for all client and server endpoints. We use the default CXF bus and get a reference to it via Spring’s @Autowired annotation.
In addition to the bus we also specify the HelloWorldImpl class which contains the actual implementation of the service. Finally we set the URI on which the endpoint will be exposed to /helloworld. Together with the 'cxf.path' configuration in the application.yml file this result into following URL that clients will need to call: http://localhost:9090/codenotfound/ws/helloworld.
package com.codenotfound.endpoint;

import javax.xml.ws.Endpoint;

import org.apache.cxf.Bus;
import org.apache.cxf.jaxws.EndpointImpl;
import org.springframework.beans.factory.annotation.Autowired;
import org.springframework.context.annotation.Bean;
import org.springframework.context.annotation.Configuration;

@Configuration
public class EndpointConfig {

  @Autowired
  private Bus bus;

  @Bean
  public Endpoint endpoint() {
    EndpointImpl endpoint =
        new EndpointImpl(bus, new HelloWorldImpl());
    endpoint.publish("/helloworld");

    return endpoint;
  }
}
The service implementation is specified in the HelloWorldImpl POJO that implements the HelloWorldPortType interface that was generated from the WSDL file earlier. We simply use the name of the received Person to construct a Greeting that is returned.
package com.codenotfound.endpoint;

import com.codenotfound.services.helloworld.HelloWorldPortType;
import com.codenotfound.types.helloworld.Greeting;
import com.codenotfound.types.helloworld.ObjectFactory;
import com.codenotfound.types.helloworld.Person;

public class HelloWorldImpl implements HelloWorldPortType {

  @Override
  public Greeting sayHello(Person request) {
    String greeting = "Hello " + request.getFirstName() + " "
        + request.getLastName() + "!";

    ObjectFactory factory = new ObjectFactory();
    Greeting response = factory.createGreeting();
    response.setGreeting(greeting);

    return response;
  }
}
Creating the CXF Client (Consumer) #
CXF provides a JaxWsProxyFactoryBean that will create a Web Service client for you which implements a specified service class.
Let’s create a ClientConfig class with the @Configuration annotation which indicates that the class can be used by the Spring IoC container as a source of bean definitions. Next we create a JaxWsProxyFactoryBean and set HelloWorldPortType as service class.
The last thing we set is the endpoint at which the Hello World service is available. This endpoint is fetched from the application.yml file so it can easily be changed if needed.
Don’t forget to call the
create()method on theJaxWsProxyFactoryBeanin order to have the Factory create a JAX-WS proxy that we can then use to make remote invocations.
package com.codenotfound.client;

import org.apache.cxf.jaxws.JaxWsProxyFactoryBean;
import org.springframework.beans.factory.annotation.Value;
import org.springframework.context.annotation.Bean;
import org.springframework.context.annotation.Configuration;

import com.codenotfound.services.helloworld.HelloWorldPortType;

@Configuration
public class ClientConfig {

  @Value("${client.ticketagent.address}")
  private String address;

  @Bean(name = "helloWorldProxy")
  public HelloWorldPortType helloWorldProxy() {
    JaxWsProxyFactoryBean jaxWsProxyFactoryBean =
        new JaxWsProxyFactoryBean();
    jaxWsProxyFactoryBean.setServiceClass(HelloWorldPortType.class);
    jaxWsProxyFactoryBean.setAddress(address);

    return (HelloWorldPortType) jaxWsProxyFactoryBean.create();
  }
}
Below HelloWorldClient provides a convenience sayHello() method that will create a Person object based on a first and last name. It then uses the auto-wired helloWorldClientProxyBean to invoke the Web Service. The result is a Greeting that is returned as a String.
Annotating our class with the @Component annotation will cause Spring to automatically import this bean into the container if automatic component scanning is enabled. This is the case as in the beginning we added the @SpringBootApplication annotation to the main SpringWsApplication class which is equivalent to using @ComponentScan.
package com.codenotfound.client;

import org.springframework.beans.factory.annotation.Autowired;
import org.springframework.stereotype.Component;

import com.codenotfound.services.helloworld.HelloWorldPortType;
import com.codenotfound.types.helloworld.Greeting;
import com.codenotfound.types.helloworld.ObjectFactory;
import com.codenotfound.types.helloworld.Person;

@Component
public class HelloWorldClient {

  @Autowired
  private HelloWorldPortType helloWorldProxy;

  public String sayHello(String firstName, String lastName) {

    ObjectFactory factory = new ObjectFactory();
    Person person = factory.createPerson();
    person.setFirstName(firstName);
    person.setLastName(lastName);

    Greeting response = helloWorldProxy.sayHello(person);

    return response.getGreeting();
  }
}
Testing the Client & Endpoint #
To wrap up the tutorial, we will create a basic test case that will use our Hello World client to send a request to the CXF endpoint that is being exposed on Spring Boot’s embedded Tomcat.
The new @RunWith and @SpringBootTest testing annotations, that are available as of Spring Boot 1.4, are used to tell JUnit to run using Spring’s testing support and bootstrap with Spring Boot’s support.
By default, the embedded HTTP server will be started on a random port. As we have defined the URL which the client needs to call with a specific port number, we need to set the DEFINED_PORT web environment. This will cause Spring to use the 'server.port' property from the application.properties file instead of a random one.
package com.codenotfound;

import static org.assertj.core.api.Assertions.assertThat;

import org.junit.Test;
import org.junit.runner.RunWith;
import org.springframework.beans.factory.annotation.Autowired;
import org.springframework.boot.test.context.SpringBootTest;
import org.springframework.boot.test.context.SpringBootTest.WebEnvironment;
import org.springframework.test.context.junit4.SpringRunner;

import com.codenotfound.client.HelloWorldClient;

@RunWith(SpringRunner.class)
@SpringBootTest(webEnvironment = WebEnvironment.DEFINED_PORT)
public class SpringCxfApplicationTests {

  @Autowired
  private HelloWorldClient helloWorldClient;

  @Test
  public void testSayHello() {
    assertThat(helloWorldClient.sayHello("John", "Doe"))
        .isEqualTo("Hello John Doe!");
  }
}
In order to run the above test, open a command prompt in the projects root folder and execute following Maven command:
mvn test
Maven will download the needed dependencies, compile the code and run the unit test case during which Tomcat is started and a service call is made. If all went well the build is reported as a success:
  .   ____          _            __ _ _
 /\\ / ___'_ __ _ _(_)_ __  __ _ \ \ \ \
( ( )\___ | '_ | '_| | '_ \/ _` | \ \ \ \
 \\/  ___)| |_)| | | | | || (_| |  ) ) ) )
  '  |____| .__|_| |_|_| |_\__, | / / / /
 =========|_|==============|___/=/_/_/_/
 :: Spring Boot ::        (v1.5.9.RELEASE)

10:26:47.793 [main] INFO  c.c.SpringCxfApplicationTests - Starting SpringCxfApplicationTests on cnf-pc with PID 5732 (started by CodeNotFound in c:\codenotfound\code\cxf-jaxws\cxf-jaxws-spring-boot)
10:26:47.796 [main] INFO  c.c.SpringCxfApplicationTests - No active profile set, falling back to default profiles: default
10:26:51.132 [main] INFO  c.c.SpringCxfApplicationTests - Started SpringCxfApplicationTests in 3.7 seconds (JVM running for 4.39)
Tests run: 1, Failures: 0, Errors: 0, Skipped: 0, Time elapsed: 4.141 sec - in com.codenotfound.SpringCxfApplicationTests

Results :

Tests run: 1, Failures: 0, Errors: 0, Skipped: 0

[INFO] ------------------------------------------------------------------------
[INFO] BUILD SUCCESS
[INFO] ------------------------------------------------------------------------
[INFO] Total time: 7.924 s
[INFO] Finished at: 2018-01-06T10:26:51+01:00
[INFO] Final Memory: 32M/360M
[INFO] ------------------------------------------------------------------------
If you just want to start Spring Boot so that the endpoint is up and running, execute following Maven command:
mvn spring-boot:run
This concludes our example of how to use Apache CXF together with Spring Boot in order to create a Web Service client and server starting from a WSDL file.
Drop a line in case something was unclear or if you just liked the tutorial.