Java - Download and Install JDK 1.9 on Windows
Table of Contents
Java is a computer programming language that is concurrent, class-based and object-oriented. It was originally developed by James Gosling at Sun Microsystems. Java applications are compiled to bytecode (class file) that can run on any Java virtual machine (JVM) regardless of computer architecture.
Java is currently owned by the Oracle Corporation which acquired Sun Microsystems in 2010. Following tutorial will show you how to setup and configure Java 1.9 on Windows so you can develop and run Java code.
JDK 9 has reached its end of life (and end of public support) as of March 2018 and users should switch to JDK 10. This is linked to the new release cycle that Java will be following which consists out of a “feature” release every 6 months and a long-term support (LTS) release every 3 years. The next planned LTS is JDK 11.
JDK Download & Install #
Java can be obtained from the Oracle Java download page. There are a number of different Java packages available, for this tutorial we will be installing Java Standard Edition (SE) on Windows.
In order to be able to compile Java code, we need the Java Development Kit (JDK) package that comes with a Java compiler. The JDK package also comes with a Java runtime environment (JRE) that is needed to run compiled Java code.
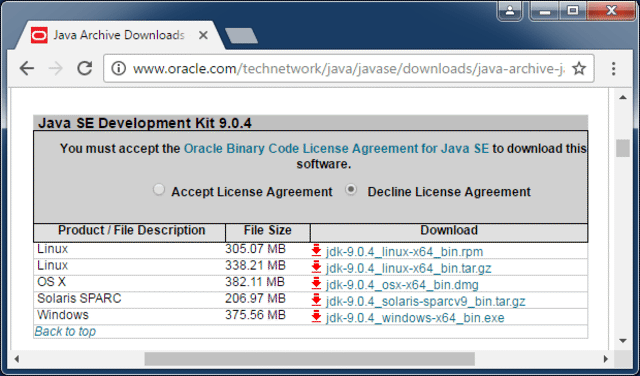
As we are installing a Java version that reached end of life, you need to scroll all the way down to the bottom of the Oracle Java download page and click on the Download button in the Java Archive section. Then look for the Java SE 9 link and after clicking on it, select the correct operating system under Java SE Development Kit 9.0.4.
Here is the direct link to download the jdk 9 installer for Windows.
Accept the License Agreement and pick the correct download for your operating system. In this example, we will use the Windows 64 bit version.
Sign in using your Oracle account (or create a new one) and the download should start. Once the download is complete, locate the jdk-9.0.4_windows-x64_bin.exe file and double-click to run the installer.
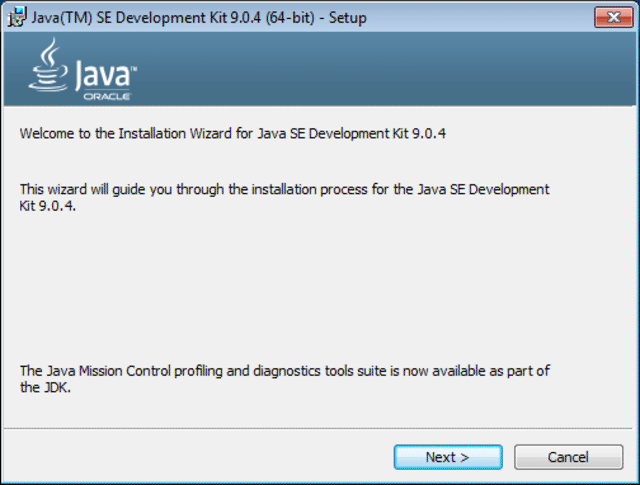
Click Next and on the following screen optionally change the installation location by clicking on the Change... button. In this example the default install location of 'C:\Program Files\Java\jdk-9.0.4\' was kept. From now on we will refer to this directory as: [java_install_dir].
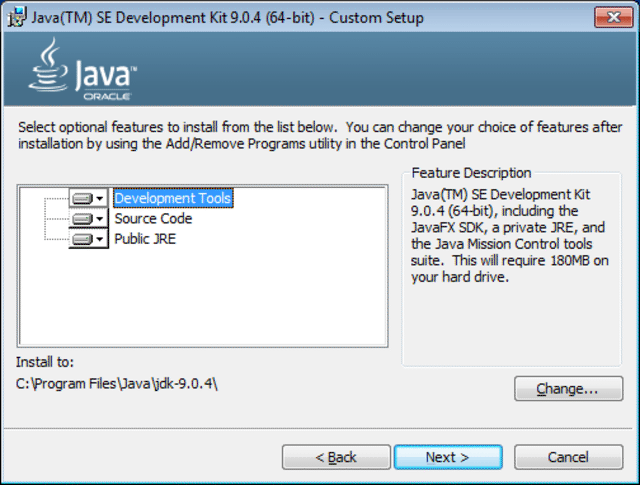
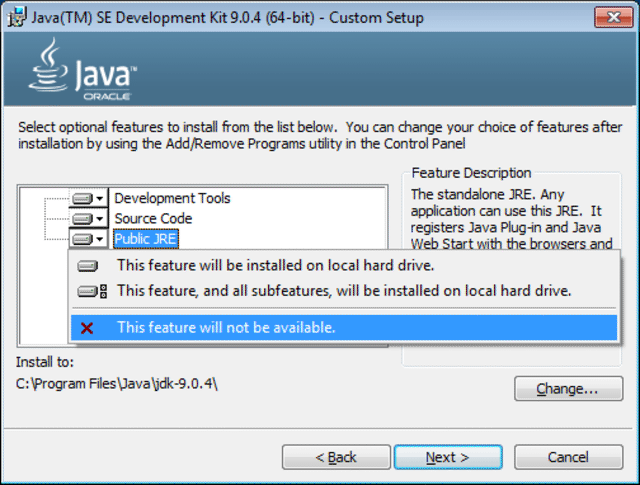
We will not install the public JRE as the JDK Development tools include a private JRE that can run developed code. Select the Public JRE dropdown and click on This feature will not be available. as shown below.
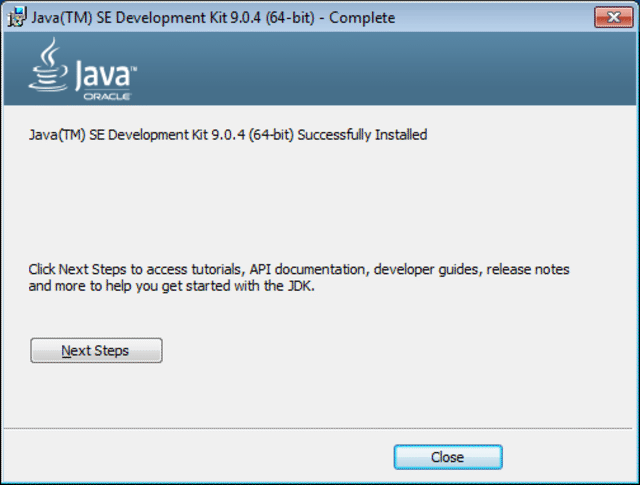
Click Next and then Close to finish installing Java.
JDK Configuration #
In order for Java applications to be able to run we need to setup a 'JAVA_HOME' environment variable that will point to the Java installation directory. In addition, if we want to run Java commands from a command prompt we need to setup the 'PATH' environment variable to contain the Java bin directory.
When using Windows the above parameters can be configured on the Environment Variables panel. Click on the Windows Start button and enter env without quotes as shown below.
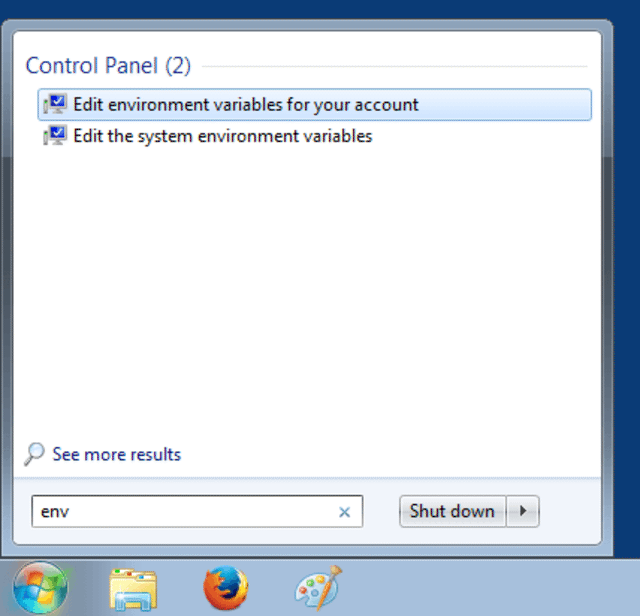
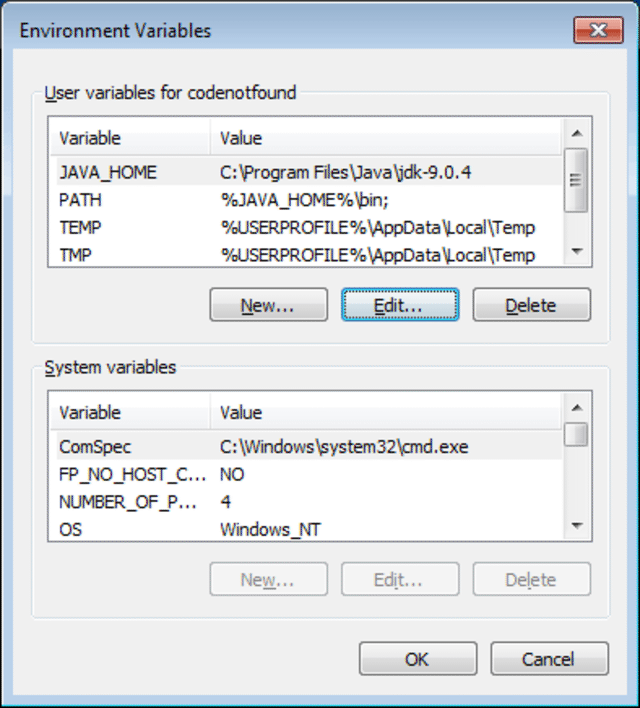
Environment variables can be set at account level or at system level. For this example click on Edit environment variables for your account and following panel should appear.
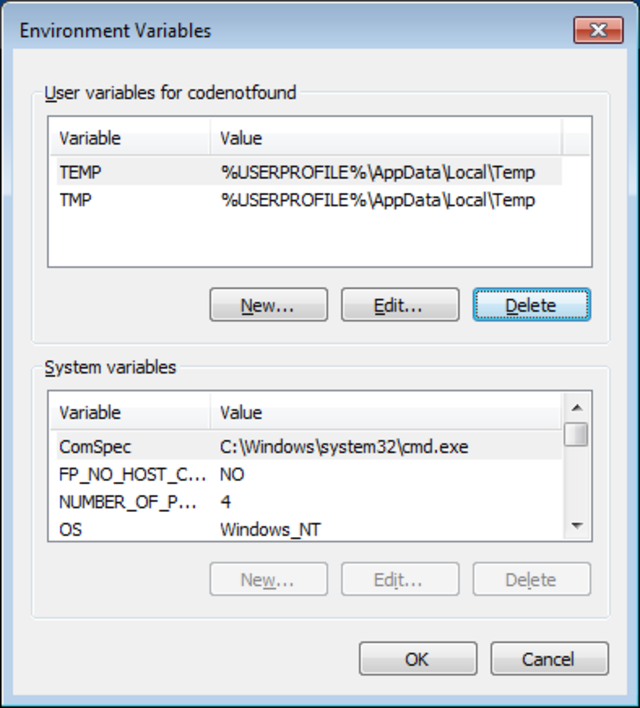
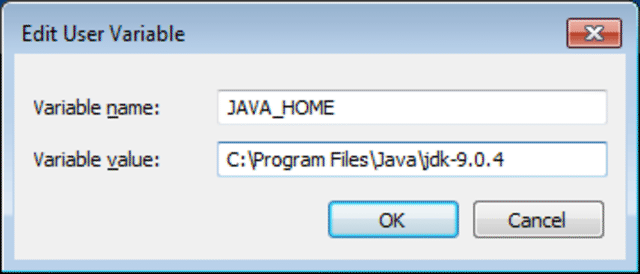
Click on the New button and enter JAVA_HOME as variable name and the [java_install_dir] as variable value. In this tutorial the installation directory is 'C:\Program Files\Java\jdk-9.0.4'. Click OK to to save.
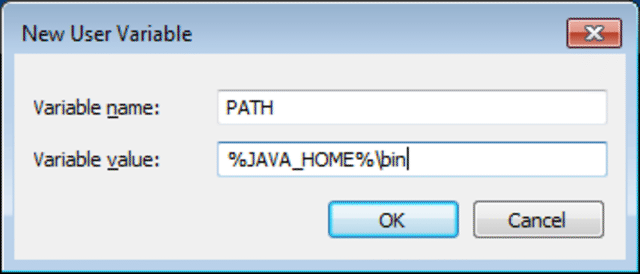
Click on the New button and enter PATH as variable name and %JAVA_HOME%\bin as variable value. Click OK to save.
Note that in case a
'PATH'variable is already present you can add;%JAVA_HOME%\binat the end of the variable value.
The result should be as shown below. Click OK to close the environment variables panel.
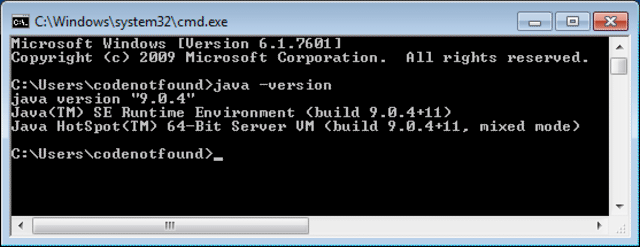
In order to test the above configuration, open a command prompt by clicking on the Windows Start button and typing cmd followed by pressing ENTER. A new command prompt should open in which the following command can be entered to verify the installed Java version:
java -version
The result should be as shown below.
This concludes the setting up and configuring JDK 1.9 on Windows.
If you found this post helpful or have any questions or remarks, please leave a comment.